|
|
 Rank: Pro   Groups: Registered
Joined: 27/08/2012 Posts: 104 Points: 312 Location: Brome Lake Quebec
|
Hi guys. I just started my first Dragon model and chose this one.  It looks ugly but interesting all the same. For all of you who know Dragon kits this won't be a surprise but the instructions are a nightmare. Pieces are incorrectly numbered, they tell you to add pieces that you subsequently have to remove and they forget to add pieces that you need. Add to that the locations of many pieces are kind of vague and you have everything you need for a real headache. Having said that the actual engineering and the quality of the moulding is superb. So the lesson is take your time, test fit everything and keep your fingers crossed. I have made progress. 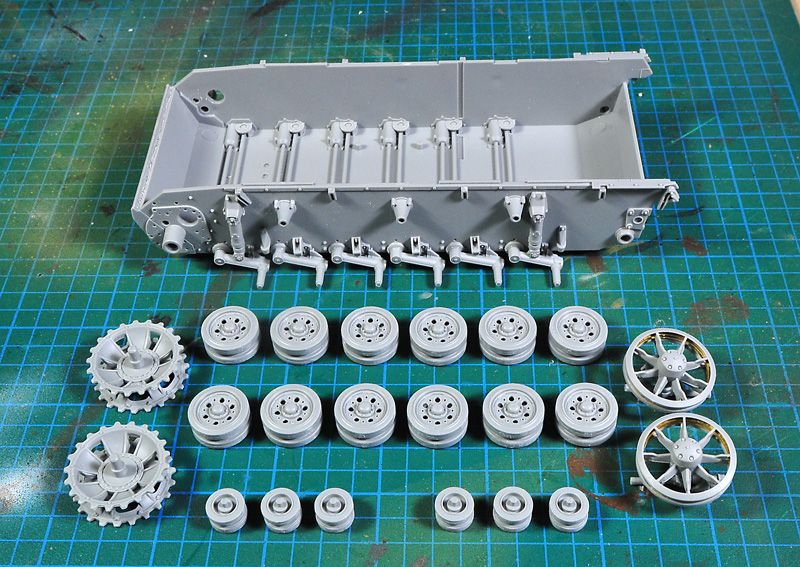 The tub and wheels are done, and the start of the topside.  I'll be moving this along shortly. All comments are welcome. John
|
|
|
Rank: Pro Groups: Joined: 24/08/2009 Posts: 48,827 Points: -13,348
|
Yay, another armour build on ModelSpace!! Well done for posting the build diary John, much appreciated and I will be following this one with interest!! 
Nice work so far John and yes it's true what you say about Dragons' instructions, they're a bit of a standing joke amongst armour modellers it would seem (AFV Club aren't much better!) and if it weren't for the fact that Dragon mouldings were so sublime, I think they would struggle to sell any kits other than to newcomers to the genre who didn't know better!!
Looking forward to your next update.  
Kev 
|
|
|
Rank: Pro Groups: Registered
Joined: 27/08/2012 Posts: 104 Points: 312 Location: Brome Lake Quebec
|
Kev Welcome along at least it's good to know that there are two of us building armour here. So a little more progress. Now that I understand the shortcomings in the instructions I am beginning to really enjoy this build. 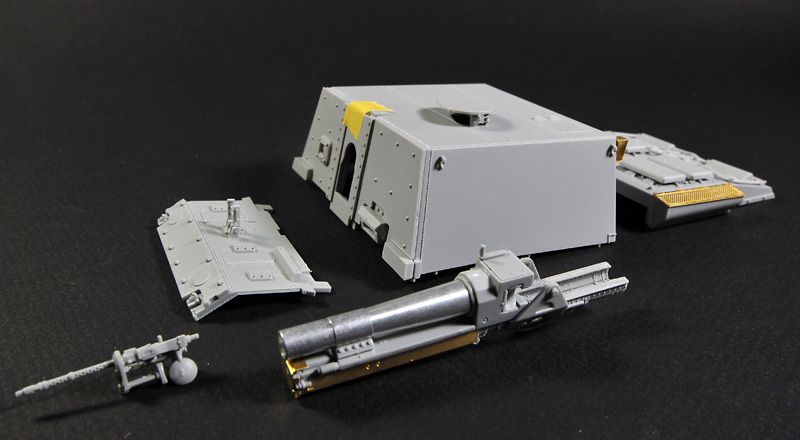 I have left a little tape on the front of the turret since the armour panel is built to slide up and down with the gun elevation.  I've added these details just to show how good the basic model castings are. More to come John
|
|
|
 Rank: Vice-Master  Groups: Registered
Joined: 06/06/2010 Posts: 566 Points: 1,657 Location: UK
|
Looks a nice kit John, progress looking great too.
Keep up the good work will be following with interest.
Wilfy
|
|
|
Rank: Pro Groups: Joined: 24/08/2009 Posts: 48,827 Points: -13,348
|
Hello John,
Making great progress already, it really does look like a nice kit and not as ugly as you say maybe? German armour is always interesting whatever shape or form as can be seen by how much of the stuff is available from manufacturers!!
Keep up the good work - enjoying the build sir!!
Kev
|
|
|
Rank: Pro Groups: Registered
Joined: 27/08/2012 Posts: 104 Points: 312 Location: Brome Lake Quebec
|
A little more progress on this. When I fitted the fenders I realised that they are moulded with a small triangular insert missing. This is no big deal but strange for a kit by this company. Anyway a little triangle cut from a spare sprue fixed the problem. 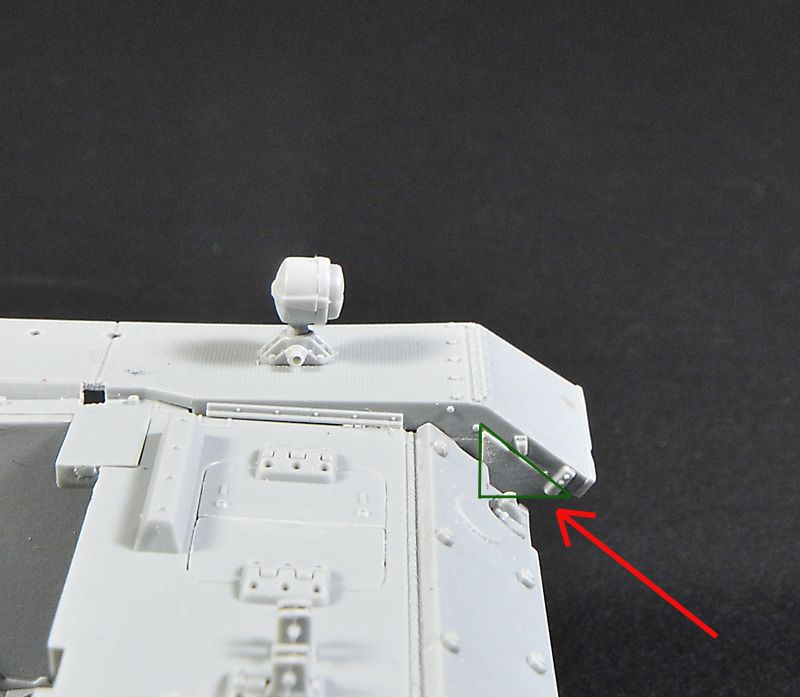 The interior will be completely concealed when finished but I thought I'd practise painting anyway.   Next step to close it all up. John
|
|
|
|
|
nice work there Current builds:-C57,Zero, Lamborghini Countach, Caldercraft HMS Agamemnon,Robi,R2-D2, MFH Cobra .
|
|
|
Rank: Vice-Master     Groups: Registered
Joined: 17/11/2012 Posts: 863 Points: 2,608 Location: Gohfeld (Germany)
|
Nice detail painting, respect!! Regards, Bernd
|
|
|
Rank: Pro Groups: Registered
Joined: 27/08/2012 Posts: 104 Points: 312 Location: Brome Lake Quebec
|
Thanks for the comments Berndt. Don't you just love it when you get to this stage. All primed and ready to go.  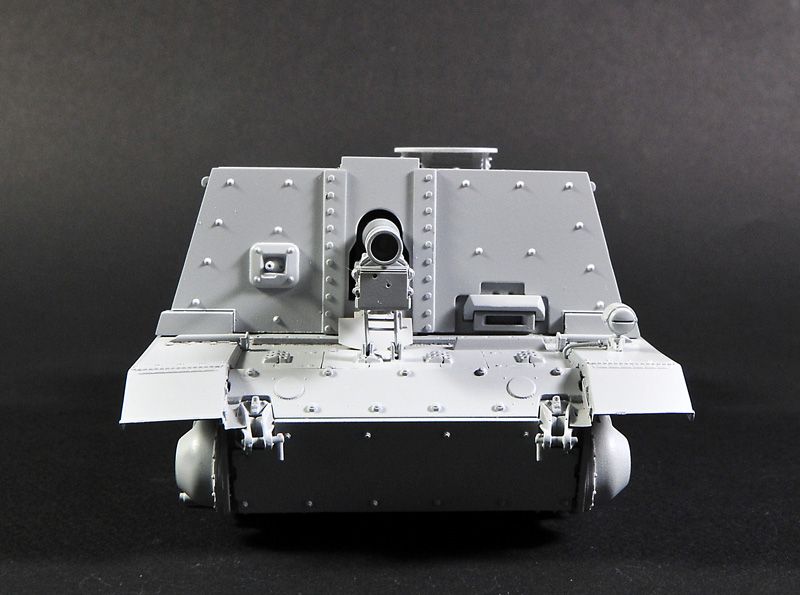  So I'm ready to fire up the Air Brush. Fingers crossed John
|
|
|
Rank: Pro Groups: Joined: 24/08/2009 Posts: 48,827 Points: -13,348
|
Cool build and photos John
|
|
|
Rank: Pro Groups: Joined: 24/08/2009 Posts: 48,827 Points: -13,348
|
Yes, looking very cool so far John and you certainly build them quickly I must say!! Love the internal weathering as well, it looks very used and dirty, good stuff - well done sir!!
Kev
|
|
|
Rank: Pro Groups: Registered
Joined: 27/08/2012 Posts: 104 Points: 312 Location: Brome Lake Quebec
|
Tomick and Kev Thanks for your kind comments. The best thing about being retired is getting to model whenever you feel like it.
John
|
|
|
Rank: Pro Groups: Registered
Joined: 06/08/2011 Posts: 480 Points: 1,421 Location: Galway
|
Great work, Looking forward to seeing how you finish her
|
|
|
Rank: Pro Groups: Joined: 24/08/2009 Posts: 48,827 Points: -13,348
|
|
|
|
Rank: Vice-Master Groups: Registered
Joined: 06/06/2010 Posts: 566 Points: 1,657 Location: UK
|
Great work John.
Love the weathering in the gun compartment.
Can't wait to see the paint job.
Wilfy
|
|
|
Rank: Pro Groups: Registered
Joined: 27/08/2012 Posts: 104 Points: 312 Location: Brome Lake Quebec
|
So I've started my favorite phase, painting. I start with a preshade in Tamiya flat black and then add some basic Tamiya German Grey. To start to define the form I then move onto a mix of Tamiya Dark Grey and about 15% Tamiya wooden deck tan. This creates a warm beige grey that contines the highlighting. 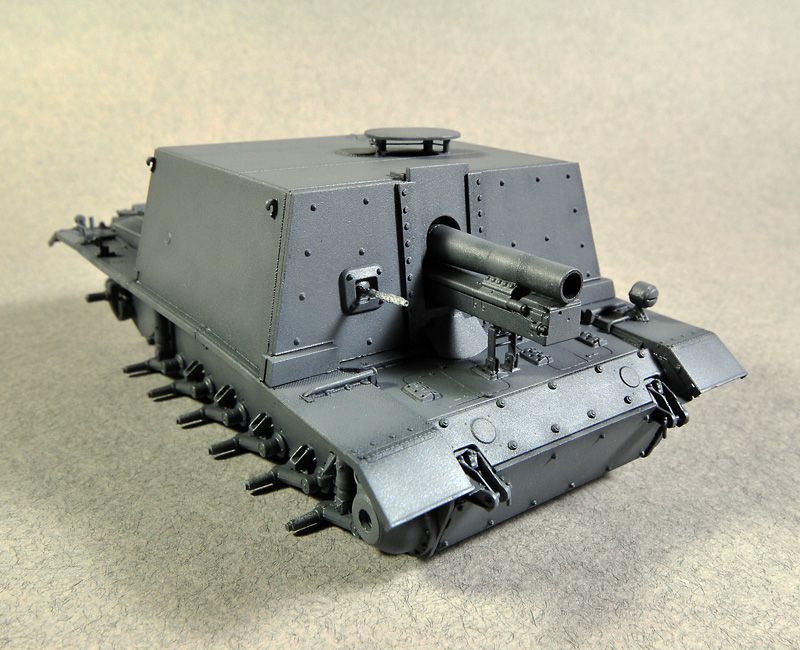  This gives a base to work on. I'll next add a light touch of Tamiya Light Grey with a little mix of Tamiya Flat Blue. This will add a cool complementary tone for the rest of the weathering to go over. I'll post my next steps soon John
|
|
|
Rank: Pro Groups: Joined: 24/08/2009 Posts: 48,827 Points: -13,348
|
Fantastic build. That is magazine quality. Very impressed.
|
|
|
Rank: Pro Groups: Joined: 24/08/2009 Posts: 48,827 Points: -13,348
|
Lovely work as usual John and nice to have the tutorial on how you paint the model, very interesting and very much appreciated too!!
Looking forward to the next update and it really is a pleasure to have another member here on MS who obviously enjoys the military genre, again very much appreciated, so keep those builds coming sir!!
Kev
|
|
|
Rank: Pro Groups: Joined: 24/08/2009 Posts: 48,827 Points: -13,348
|
unhinged wrote:Fantastic build. That is magazine quality. Very impressed.
Sorry to hijack your thread John, but I just wanted to say hello to our new member and a big warm welcome to UH, nice to have yet another member who appreciates the military stuff!!
Will you be posting any builds UH?? The more the merrier!!
All the best,
Kev
|
|
|
Rank: Pro Groups: Registered
Joined: 27/08/2012 Posts: 104 Points: 312 Location: Brome Lake Quebec
|
UH thanks for your compliments and for looking in. Kev no problem So I got through the next couple of steps since I'm going to be away for a few days I thought I'd post a couple of piccies. I've added the cool blueish highlights. It's a little exaggerated for the moment but it will tone down in time. The storage lockers are not fixed yet. 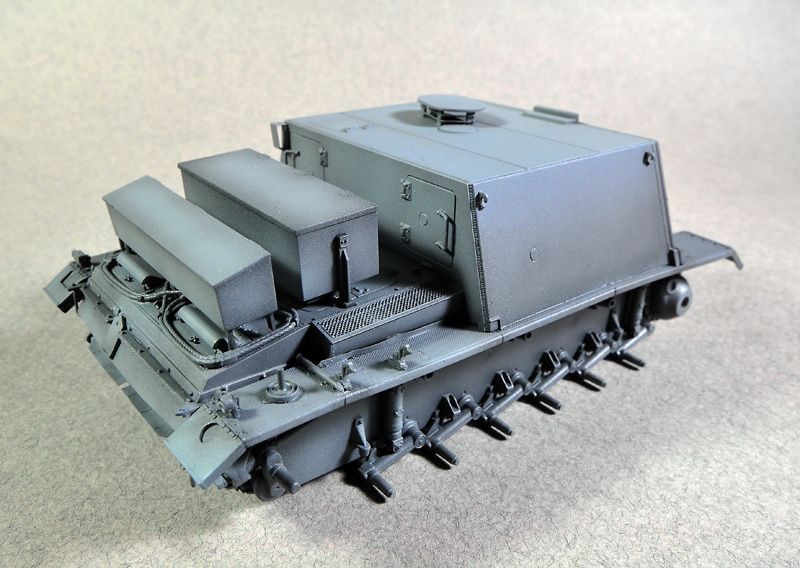 The next stage is to apply an overall wash in Burnt Umber oils, thinned a lot with an odourless white spirit. This provides the final base colour over which decals and weathering will be applied. 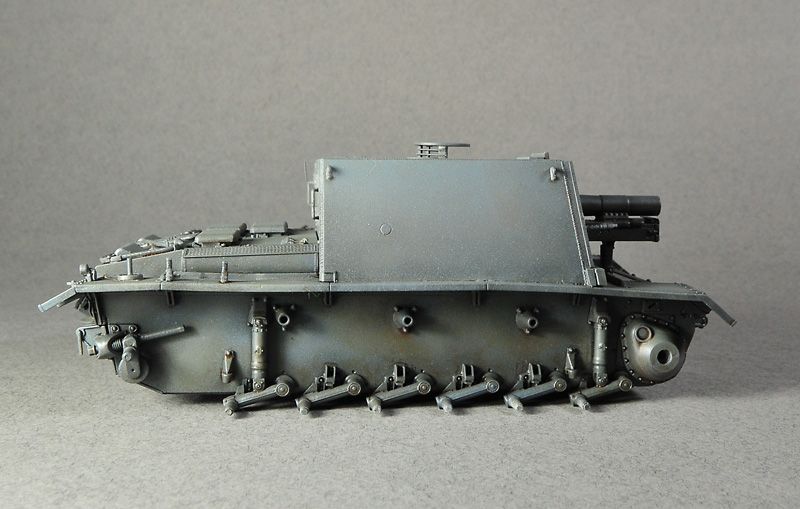 The trick with this kind of wash is to apply it quite roughly all over the model and to leave it for about 2-3 hours so most of the white spirit evaporates. You can then take a dry cotton bud and remove or adjust the wash to taste. I like to keep an uneven finish to provide more colour modulation across the piece. More to come when I get back. All the very best for the holidays to everyone. John
|
|
|
|
Guest
|
 US
US

