|
|
 Rank: Super-Elite        Groups: Registered
Joined: 30/01/2013 Posts: 4,604 Points: 13,607 Location: Monmouthshire UK
|
This is a little "know how" on creating simple, neat and even deadeyes on shrouds.
I took these pics while doing the topmast shrouds on my Victory but the same method is also used for the lower shrouds too.
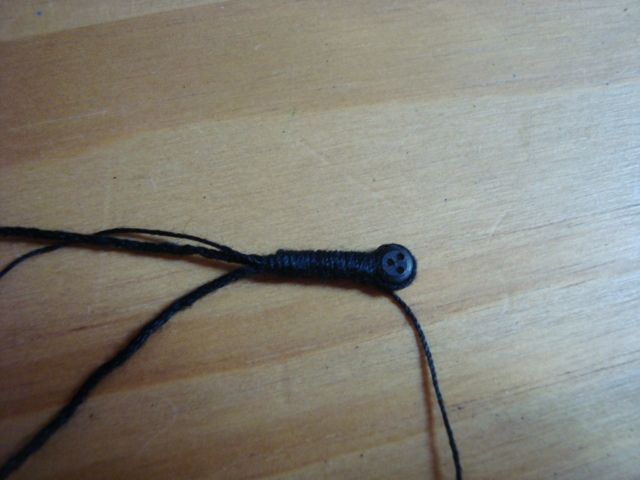
Firstly you will need a little tool, I call him "Deadeye Dave" it's just a scrap of 5mm wood with a deadeye glued to one end, 2 wire prongs are inserted and bent at the exact distance needed between the deadyes, this is the distance that will be linked with the tension lanyards. The distance of this will vary for different builds. You will need another of these for the topmasts as the distance between the deadeyes there will be less. Here are my 2 tools, one set at 20mm and one for the topmasts set to 15mm.
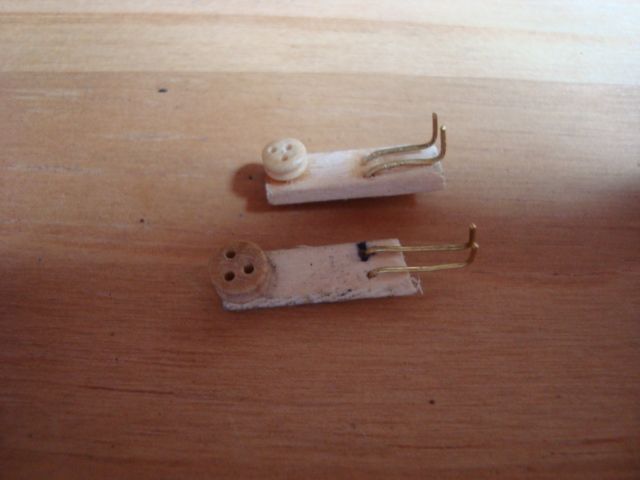
The sole purpose of this tool is to set the shroud length quickly and easily. The tool is placed in the lower deadeye by inserting the 2 pins into the 2 side by side holes.
The corresponding shroud for this deadeye is then wrapped around the deadeye on the tool at medium tension and then squeezed with your fingers so you can still remove it easily from the tool.
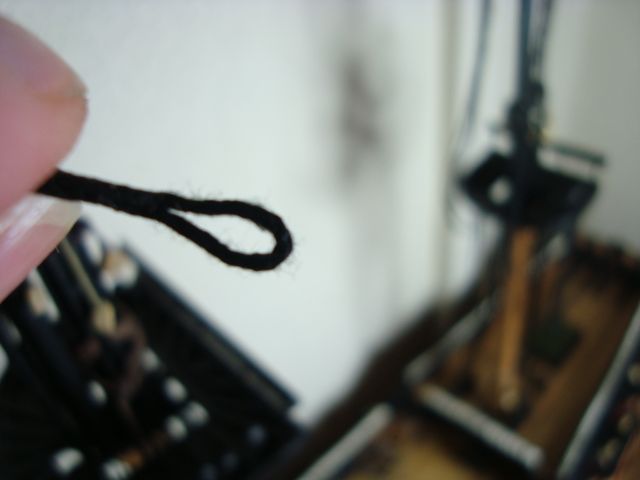
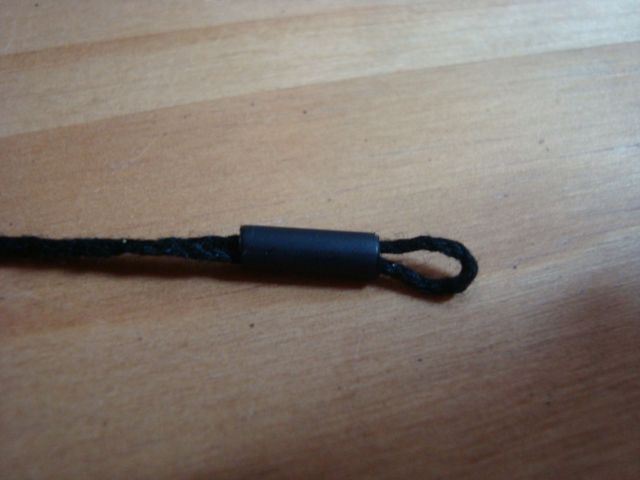
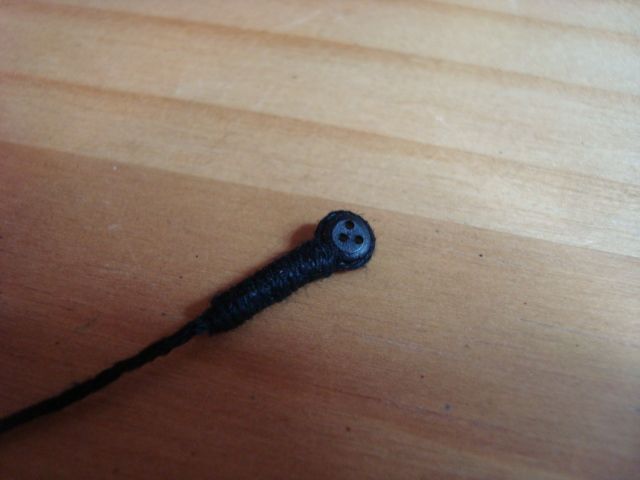
Next, slide a 10mm length of heatshrink over the loop and place a deadeye into the end loop, then push the heatshrink tight against the deadeye.
Heatshrink is available very cheaply at about £1 a meter and you need a diameter to suit your shroud thread, mine is 2.4mm un-shrunk and will shrink tight to a 3:1 ratio. For example 3mm un-shrunk will shrink to 1mm.
A heat gun is the best tool to shrink with but the tip of a soldering iron also works fine.
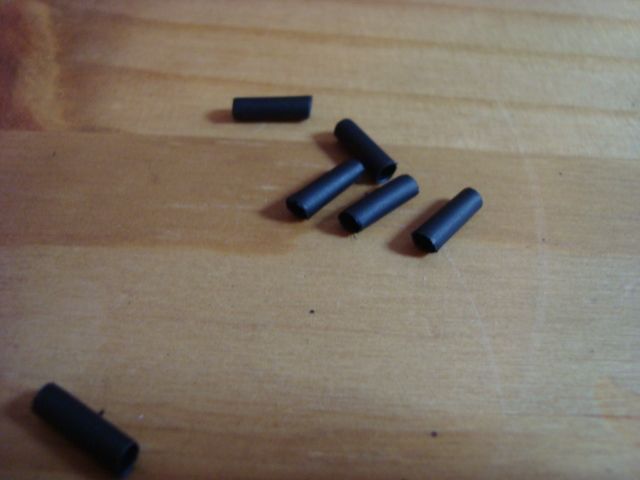
This is the heatshink pre-cut into 10mm lengths -
now placed over the loop -
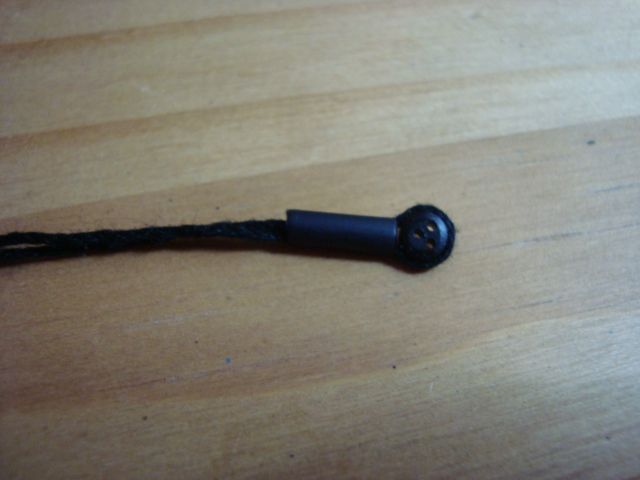
Insert deadeye and push tight against it -
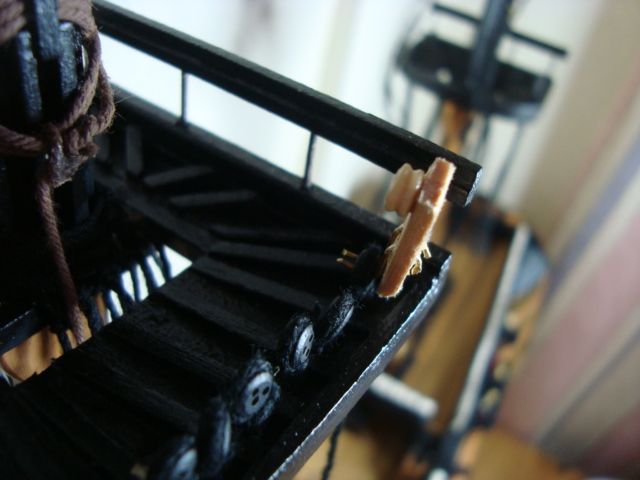
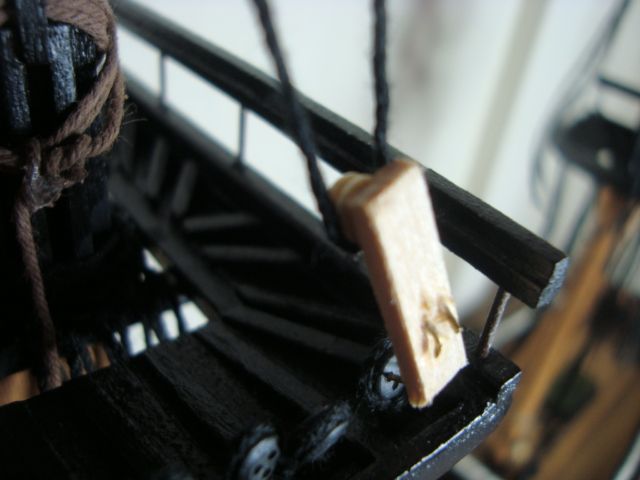
You can move the deadeye tool to each shroud location and repeat the above to all shrouds on one side of the mast as the heatshrink is tight enough at this stage to hold it's position. Tag each shroud with a little masking tape with the position number as the shrouds will be getting gradually longer toward the stern so you will need to make sure they stay in order.
The mast can then be removed to the bench for the remainder, this will involve heating the shrink to seal the deadeye in place and then binding over the shrink with the usual binding method.
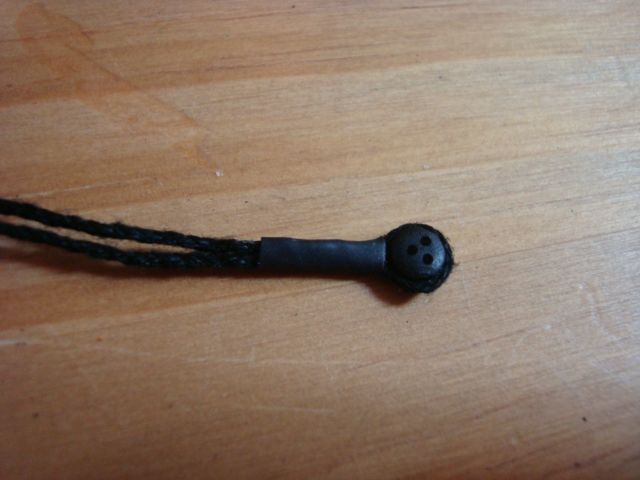
This shows the shrink after heating -
Bind in the usual way -
and here is the completed bind -
The advantages of this method is that you are only sizing the shrouds while the mast is on the ship, all the rest can be done on the bench.
The benefit of the heatshrink is -
1.Much neater bindings as you can use the shrink length to gauge the binding length
2. No glue required
3. The shrink is easier to wrap than just the thread which can be tricky as it flops around when you try to wind it.
4. You can still push a needle through the shrink when it comes to doing the lower ratlines, if you used CA then this would not be possible.
|
|
|
 Rank: Pro Groups: Joined: 24/08/2009 Posts: 48,827 Points: -13,348
|
Great idea Steve and thanks for sharing 
|
|
|
|
|
nice tutorial. It works well. will ad that to my list of posts favourites 
Jase“Whenever you find yourself on the side of the majority, it is time to pause and reflect.”
-Mark Twain
|
|
|
Rank: Pro  Groups: Registered
Joined: 24/01/2011 Posts: 206 Points: 614 Location: halifax
|
fantastic idea cheers steve
|
|
|
 Rank: Elite   Groups: Registered
Joined: 22/03/2010 Posts: 2,065 Points: 6,295 Location: Gorleston-on-sea
|
Nice one Steve..Thanks for sharing it with us mate...Brill!!!   Current Builds: Deagostini HMS Victory: Deagostini HMS Sovereign of the seas. Completed Builds: Del Prado: HMAS Bounty: Hachette: RMS Titanic: Del Prado: Cutty Sark...
|
|
|
Rank: Super-Elite Groups: Registered
Joined: 30/01/2013 Posts: 4,604 Points: 13,607 Location: Monmouthshire UK
|
Thanks guys, Hope it can prove useful to someone reaching this stage Steve
|
|
|
|
Guest
|
 US
US

